
Disclaimer: This article is meant towards individuals who already have some experience with Azure DevOps and Feeds.
You have been working on a project that utilizes the Azure Storage Services and you have successfully implemented part 1/2 of this article.
Everything is working properly in our local environment, and we decide to make a NuGet package out of our library.
The passionate developer in you, wants to run your unit/integration tests each time you want to publish a new version of your package to ensure a correct package is released.
Requirements
- Create a debuggable NuGet package from our library.
- Deploy it to a feed in Azure DevOps.
- Run unit/integration tests against Azurite in the build pipeline to ensure a correct package is released.
Preparing to release our library as a NuGet package
Not only do we want to publish a NuGet package but we want it to also be debuggable (we may use this for an internal project only).
So not only do we need to release the package but we need to release also the symbols for it.
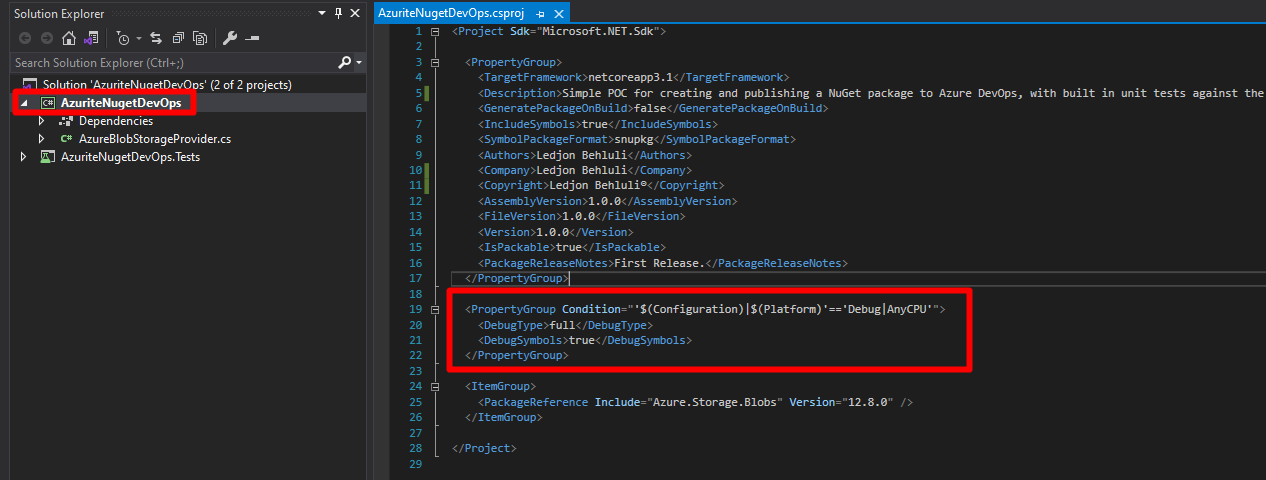
If we have a look at the contents of our “.csproj” file we can see the usual properties that go along with releasing a NuGet package (Description, Authors, Assembly/File Versions, etc.).
We make sure to create a new PropertyGroup as show below.
This is needed so we can debug our NuGet package by specifying the configuration and by including the symbols.
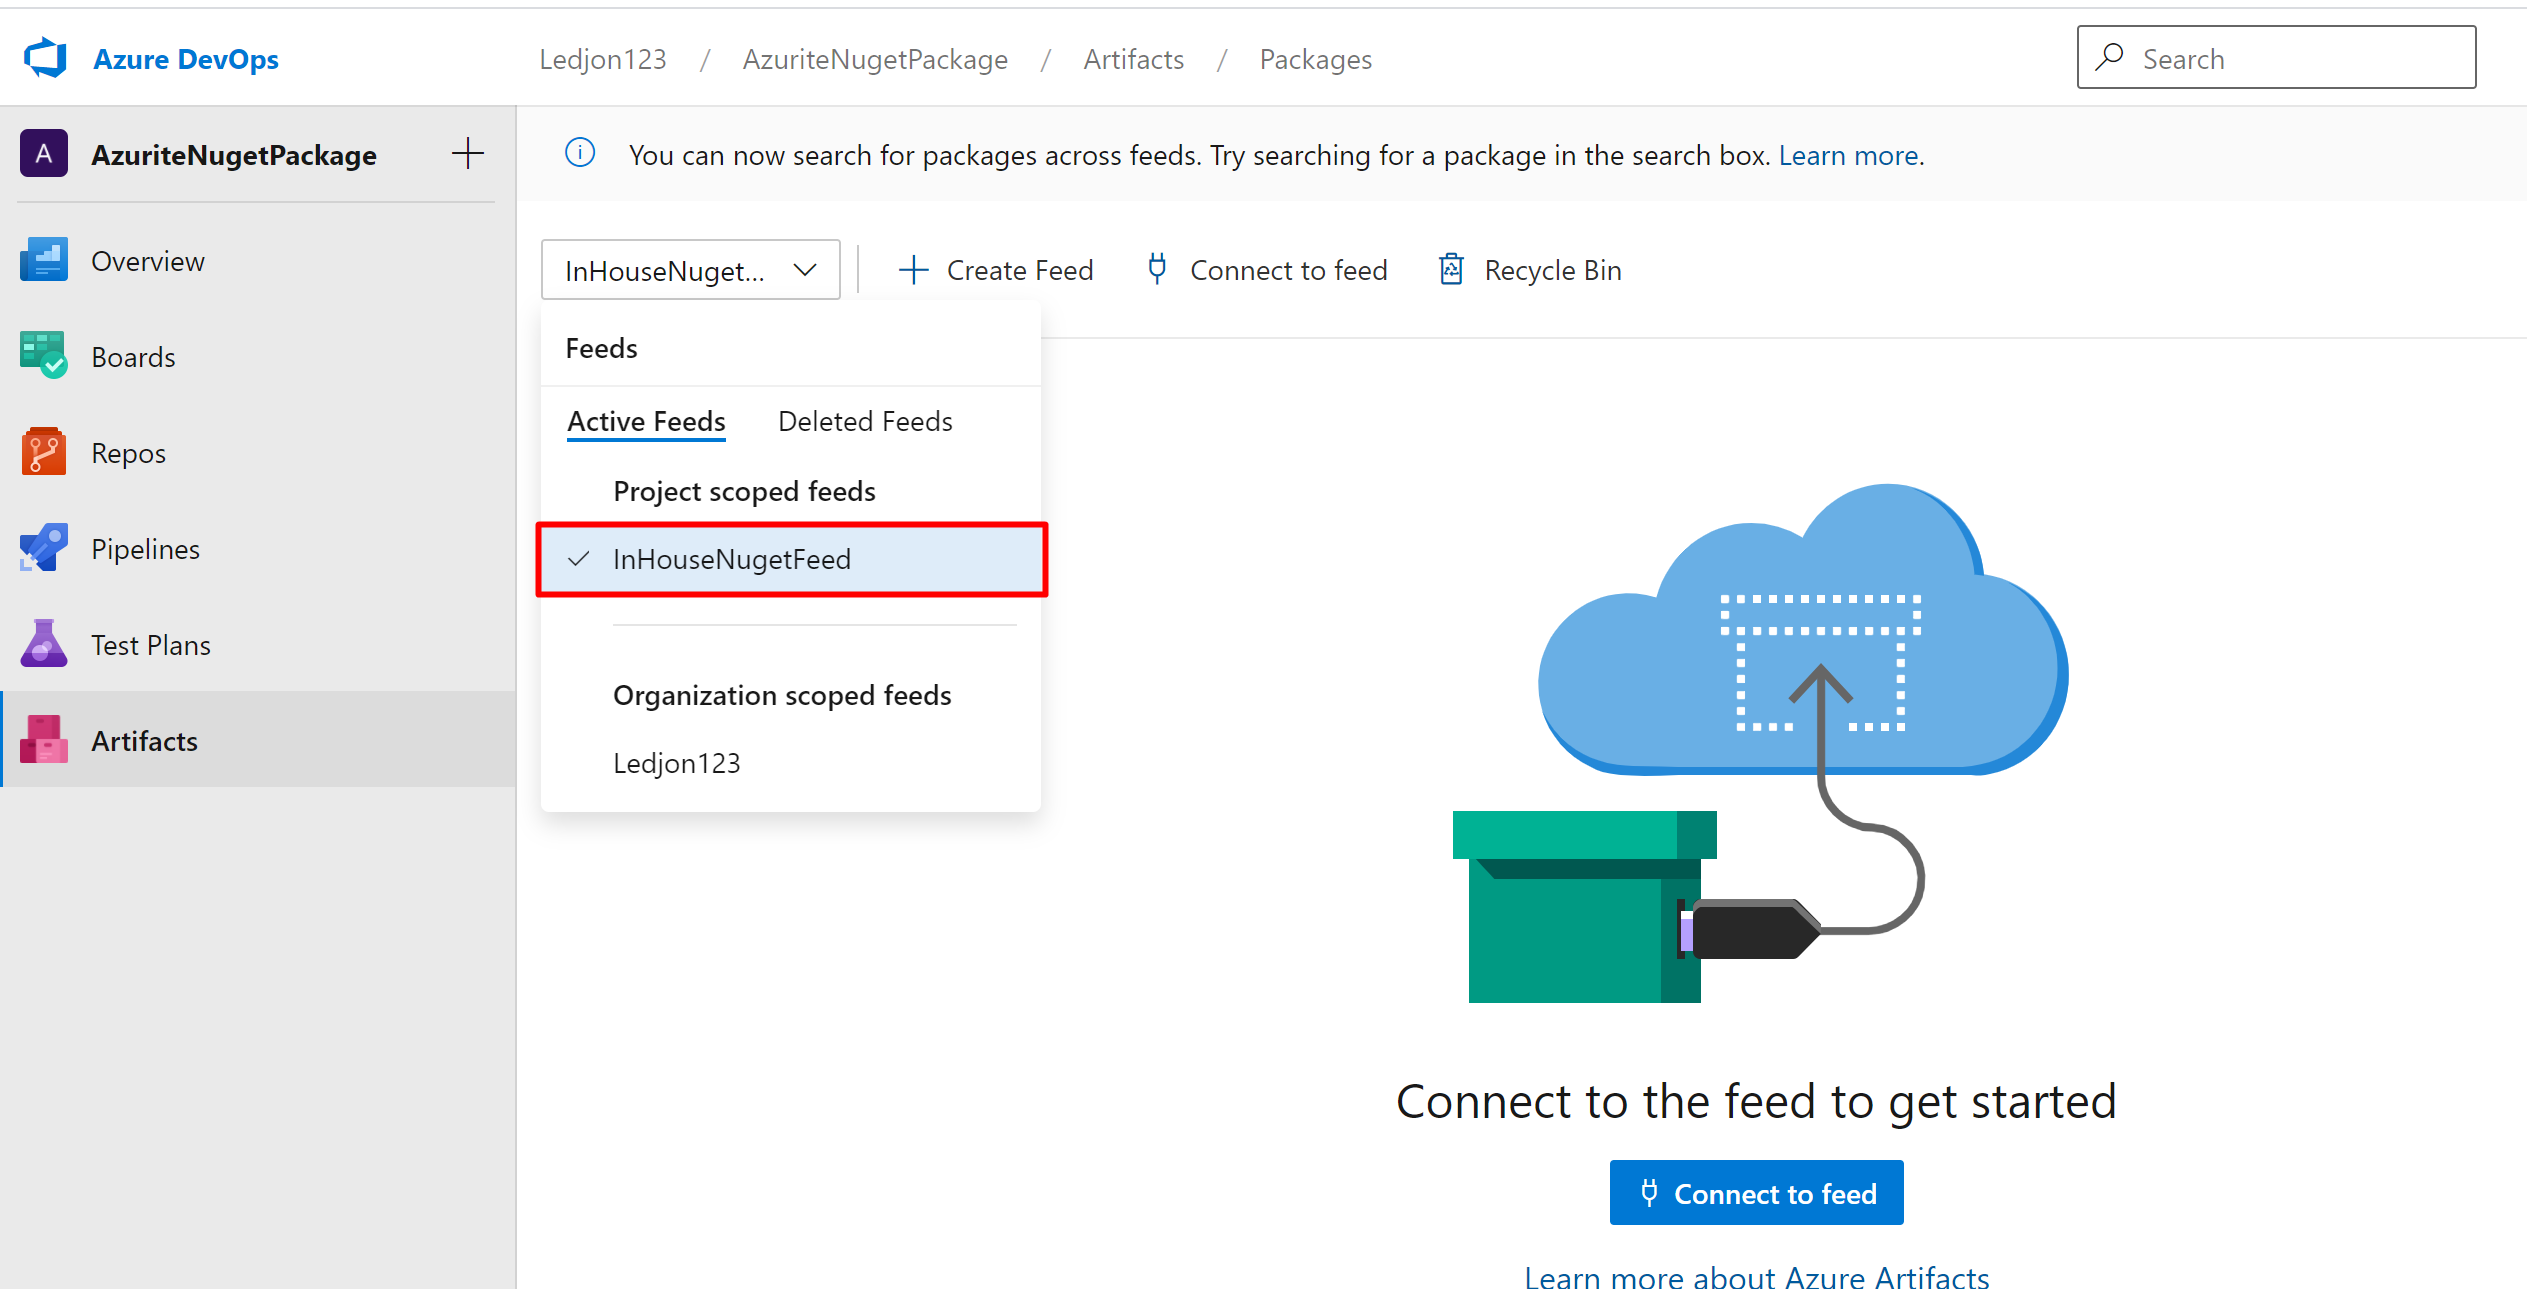
Creating a feed in Azure DevOps
There are countless articles on how to get started with package feeds in Azure DevOps, so I’m just going to reference one from Microsoft.
Structuring the build pipeline
The first logical structure of the build pipeline considering our needs, could look something like this:
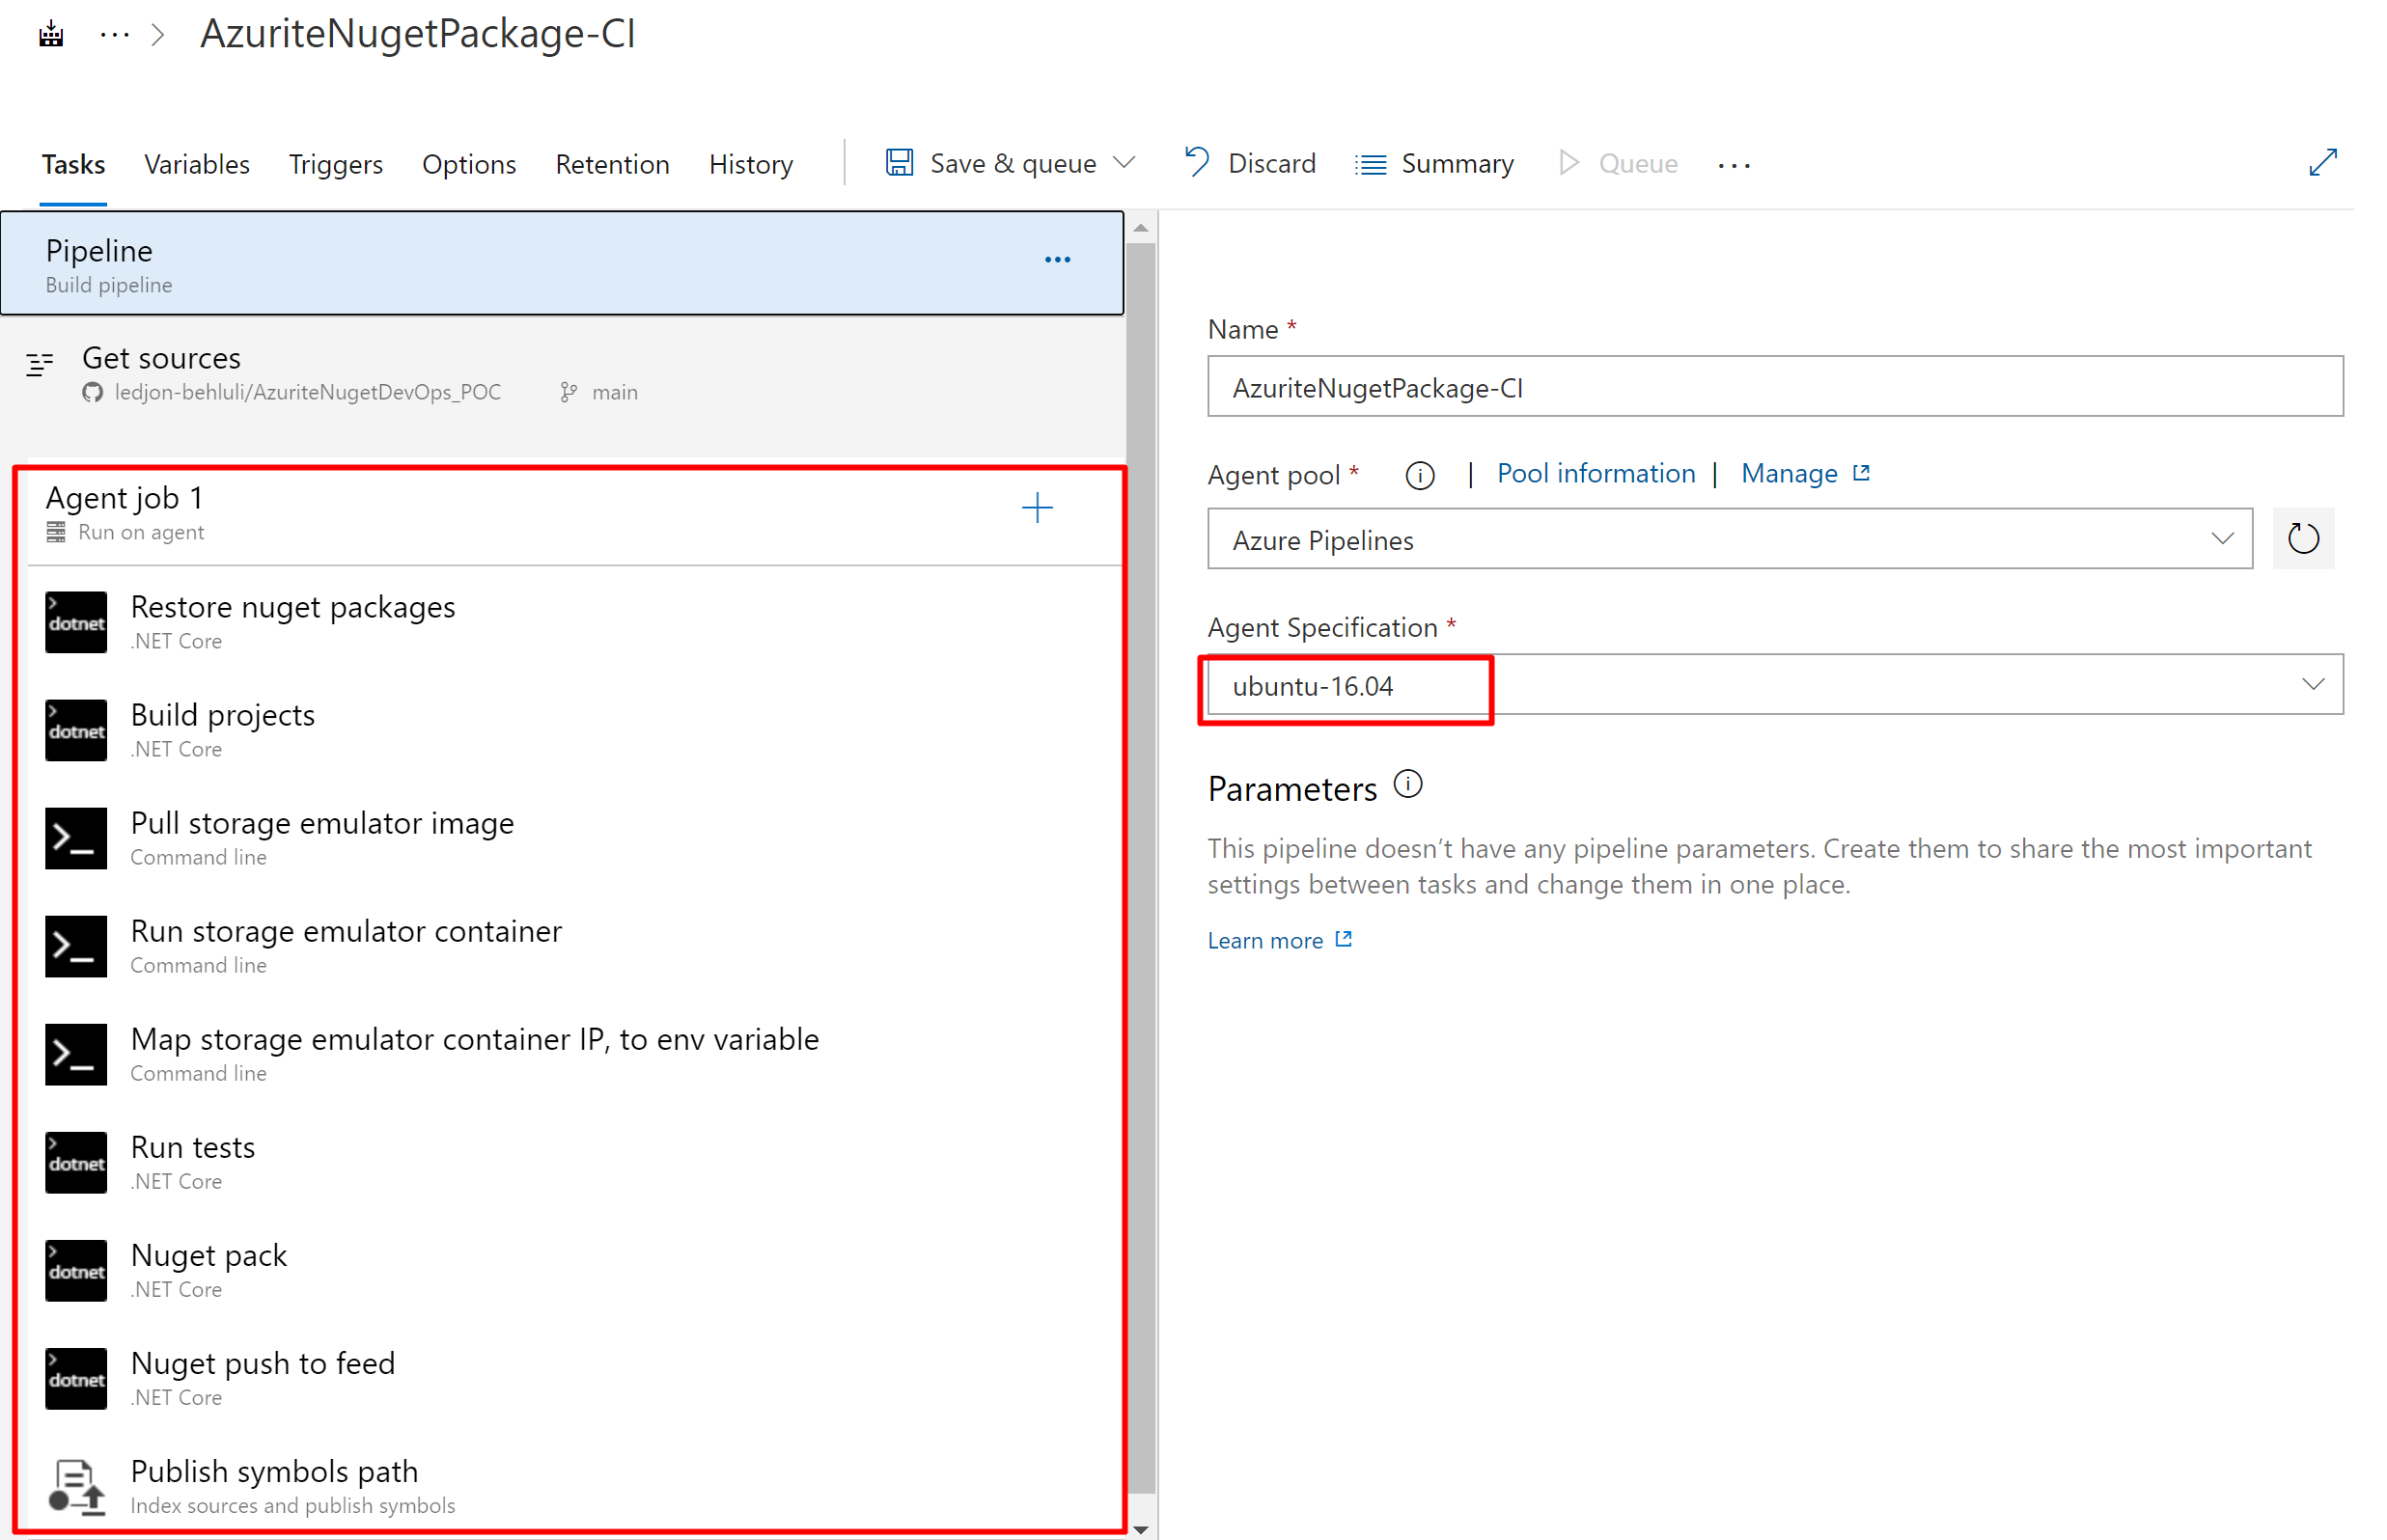
Let’s briefly discuss the tasks of the pipeline:
- Agent Job 1 — Is the agent under which we run our pipeline.
Note that the “Agent Specification” is set to “ubuntu-16.04” because Azurite is available (at this time) only for Linux containers. - Restore nuget packages — Is a .NET Core task which restores the NuGet packages in both Library & Tests projects.
- Build projects — Is a .NET Core task which builds both the Library & Tests projects.
- Pull storage emulator — Is a command line task which pulls the latest image of Azurite from DockerHub.
docker pull mcr.microsoft.com/azure-storage/azurite - Run storage emulator — Is a command line task which runs the image as a docker container. Here we tell docker to run Azurite in a detached state (via the “-d” parameter),
so that the command line doesn’t hang on this step. The “-p 10000:10000” will expose the blob service’s default listening port.docker run -d -p 10000:10000 mcr.microsoft.com/azure-storage/azurite azurite-blob --blobHost 0.0.0.0 - Map storage emulator container IP, to env variable — Is a command line task which maps the container’s IP address to the environmental variable AZS_CONTAINER_IP, as we need it in our next task which is the “Run tests”.
Localhost won’t work as it did in the previous article when we were running it locally!
This is the content of the command line task:
ips=($(docker container inspect --format '{{range .NetworkSettings.Networks}}{{.IPAddress}} {{end}}' $(docker container ls -q --filter ancestor=mcr.microsoft.com/azure-storage/azurite)))
containerIp=${ips[0]}
echo "Container ip = $containerIp"
echo "##vso[task.setvariable variable=AZS_CONTAINER_IP]$containerIp"
Let’s dissect it:
Below command gets and format’s the container’s IP address in a proper Internet Protocol format. For example: 172.17.0.2.
ips=docker container inspect --format '{{range .NetworkSettings.Networks}}{{.IPAddress}} {{end}}' $(container_id)Below command gets the container’s id from the image. This is needed as the id will always change and we can not hard code it.
This id goes into the placeholder in the above command represented via $(container_id).
docker container ls -q --filter ancestor=mcr.microsoft.com/azure-storage/azuriteBelow command extracts the IP address into a variable “containerIp” which takes the first IP address (if there are multiple).
containerIp=${ips[0]}Below command simply prints the IP in the command line so we can see it when the pipeline runs.
echo "Container ip = $containerIp"Below command creates and assigns the IP to the environmental variable AZS_CONTAINER_IP so it is available in the next task.
echo "##vso[task.setvariable variable=AZS_CONTAINER_IP]$containerIp"- Run tests — Is a .NET Core task which will run our tests.
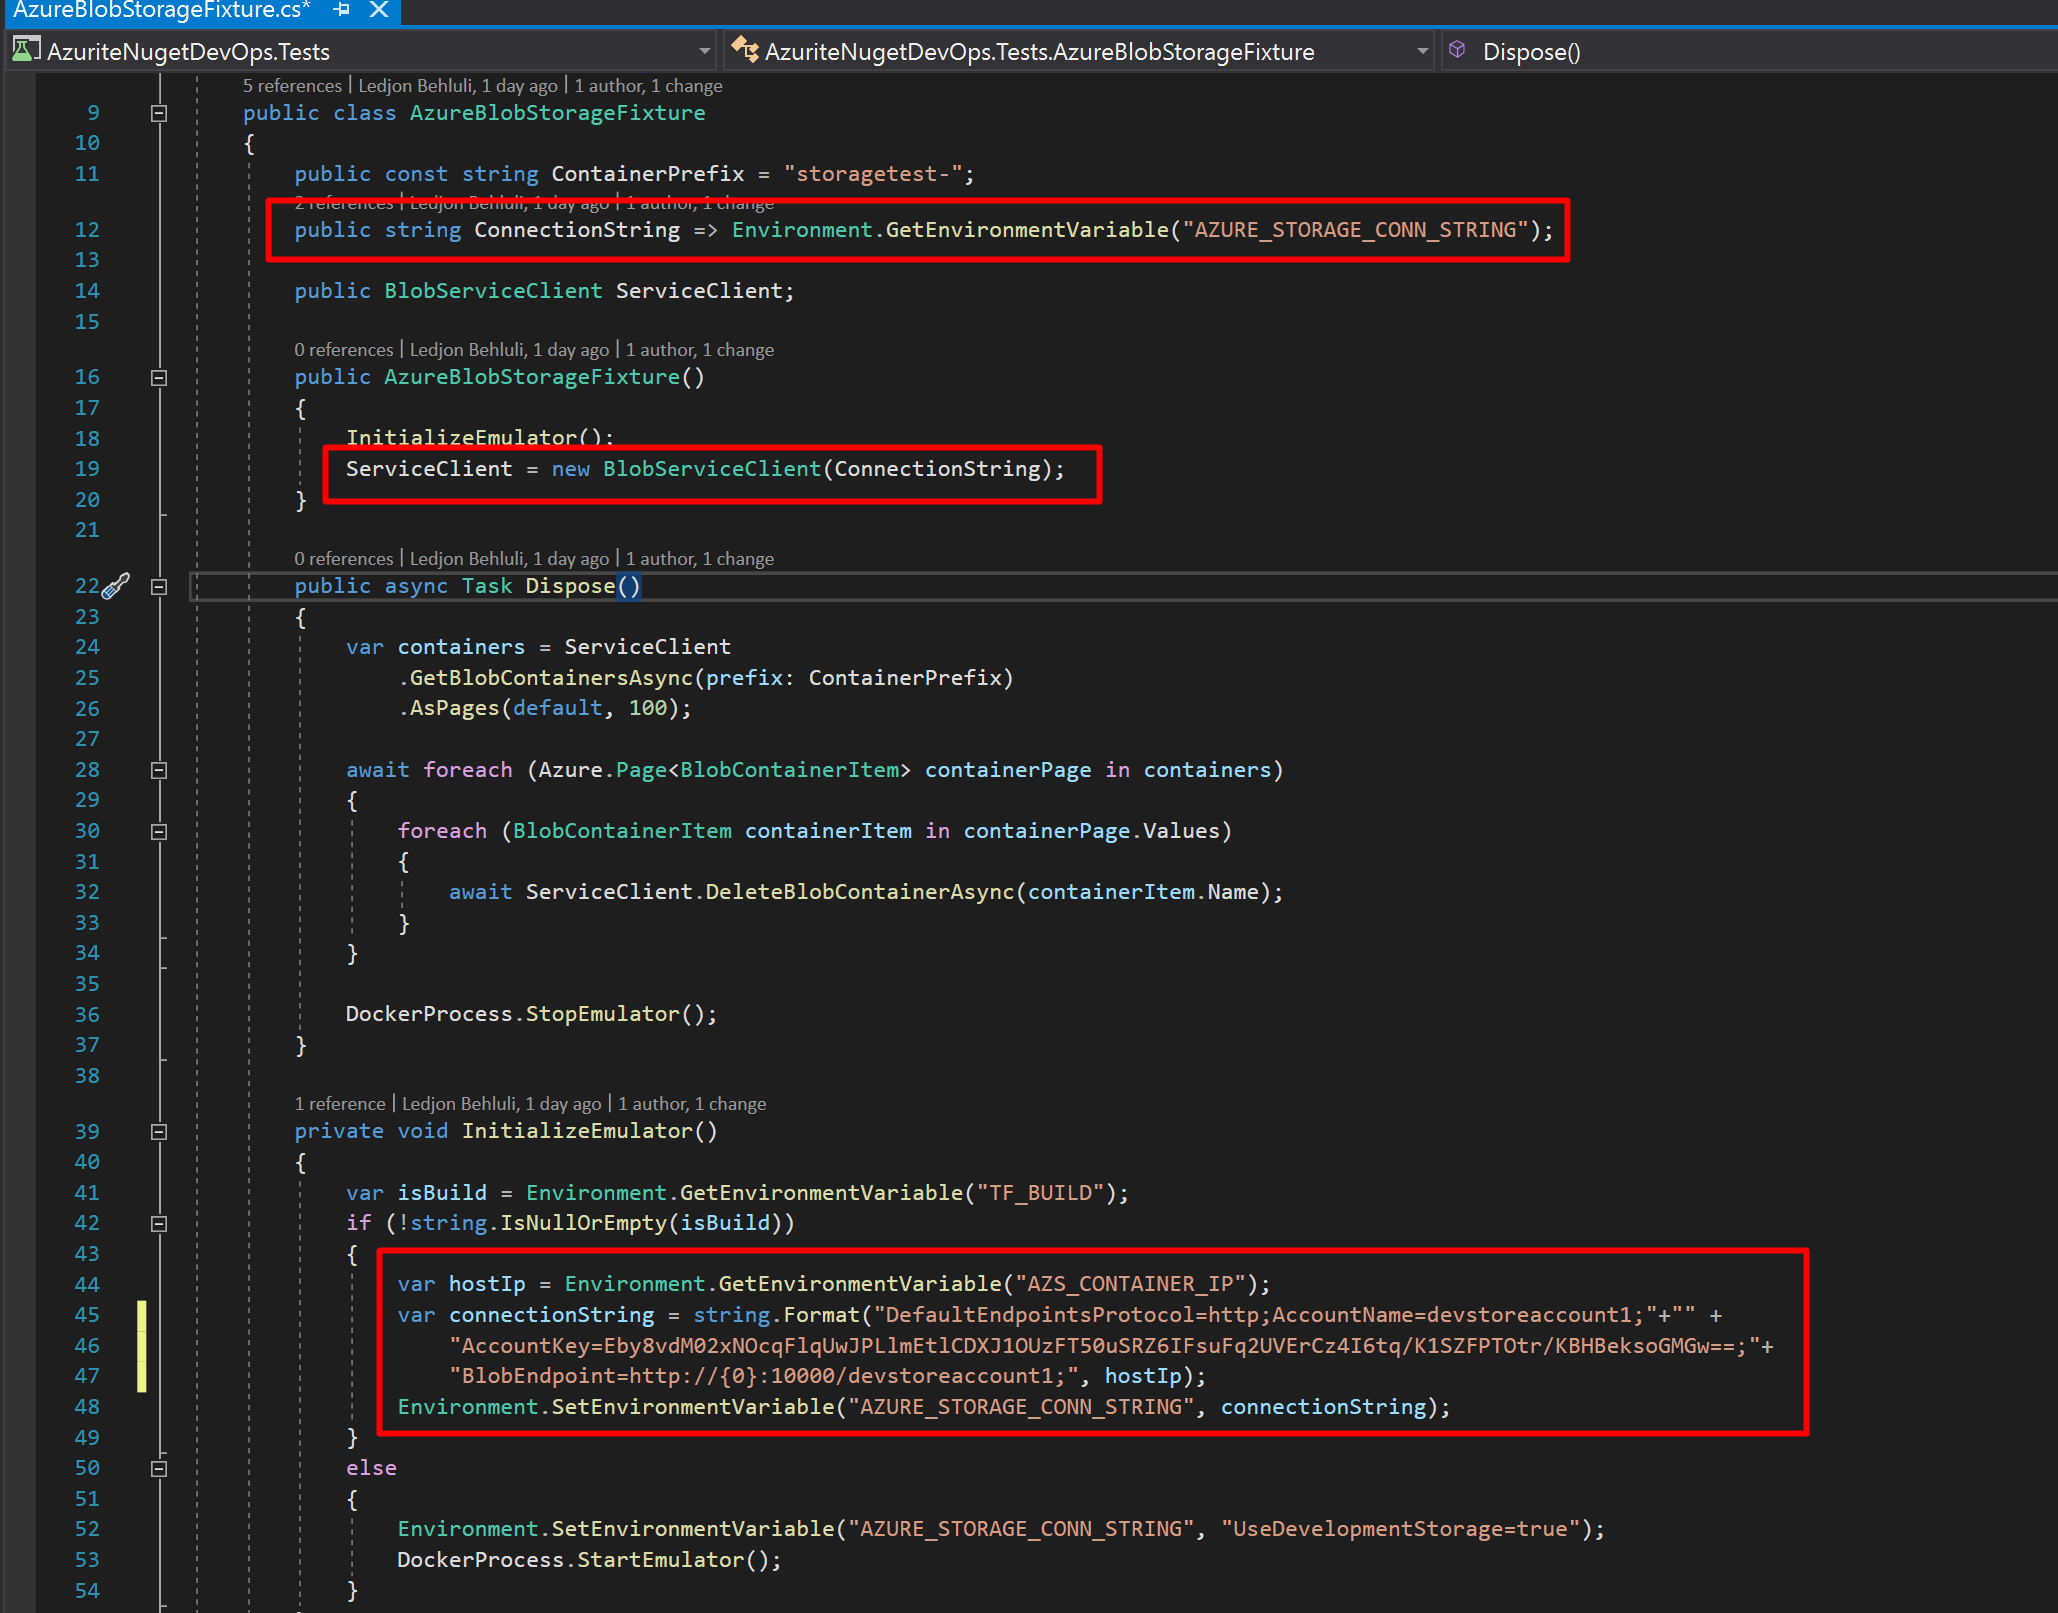
If we have a look at the class AzureBlobStorageFixture that we introduced in part 1/2.
We can see that the environment is now DevOps (via the TF_BUILD variable).
So we read the IP address that the previous task put into AZS_CONTAINER_IP and we use that to format the Azurite connection string.
We put that string into the environmental variable AZURE_STORAGE_CONN_STRING which will be supplied to the BlobServiceClient in the constructor of the fixture class.
- Nuget pack — Is a .NET Core task which will pack our library as a “.nupkg” file and place it in the $(Build.ArtifactStagingDirectory).
- Nuget push to feed — Is a .NET Core task which will pick up the “.nupkg” and push it to our feed we created InHouseNugetFeed.
- Publish symbols path — Is a “Index Source and Publish Symbols” task which will index our “.pdb” file and publish it to Azure Symbols Server. Our package consumers can connect to the symbols server to get the “.pdb”, with it they can debug through our package.
Running the pipeline (attempt 1)
After we committed the code to the GitHub repository the build pipeline has been triggered and we notice that everything has went well EXCEPT,
that the build has failed at the task “Publish symbols path”.
This in it self is not a big problem as the projects has been build, Azurite has started and it’s container IP address has been retrieved,
the tests project could connect successfully, the tests itself all passed, and the NuGet package has been created.
But remember one of our requirements was to “Create a debuggable NuGet package” which we can’t do as the symbols failed to be published to the symbols server.
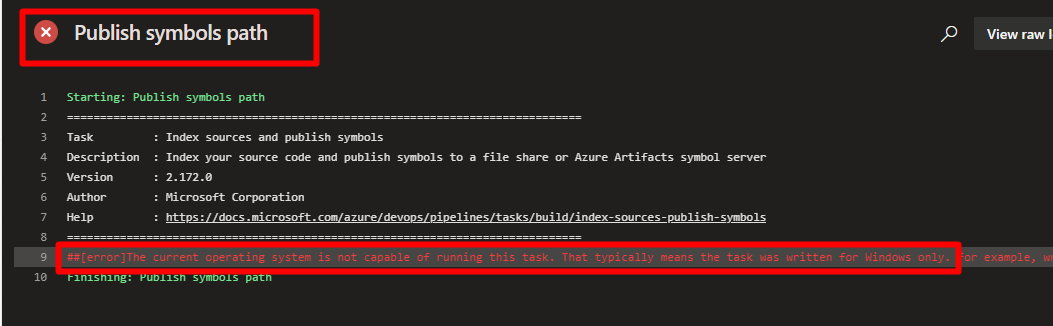
##[error]The current operating system is not capable of running this task. That typically means the task was written for Windows only.The error messages says it loud & clear. The Index Sources & Publish Symbols task was build for Windows OS only!
This is a bit problematic since we can not change the agent specification to be of a Windows type OS, since we can not run the Azurite tasks above.
Solution to the Index Sources & Publish Symbols problem
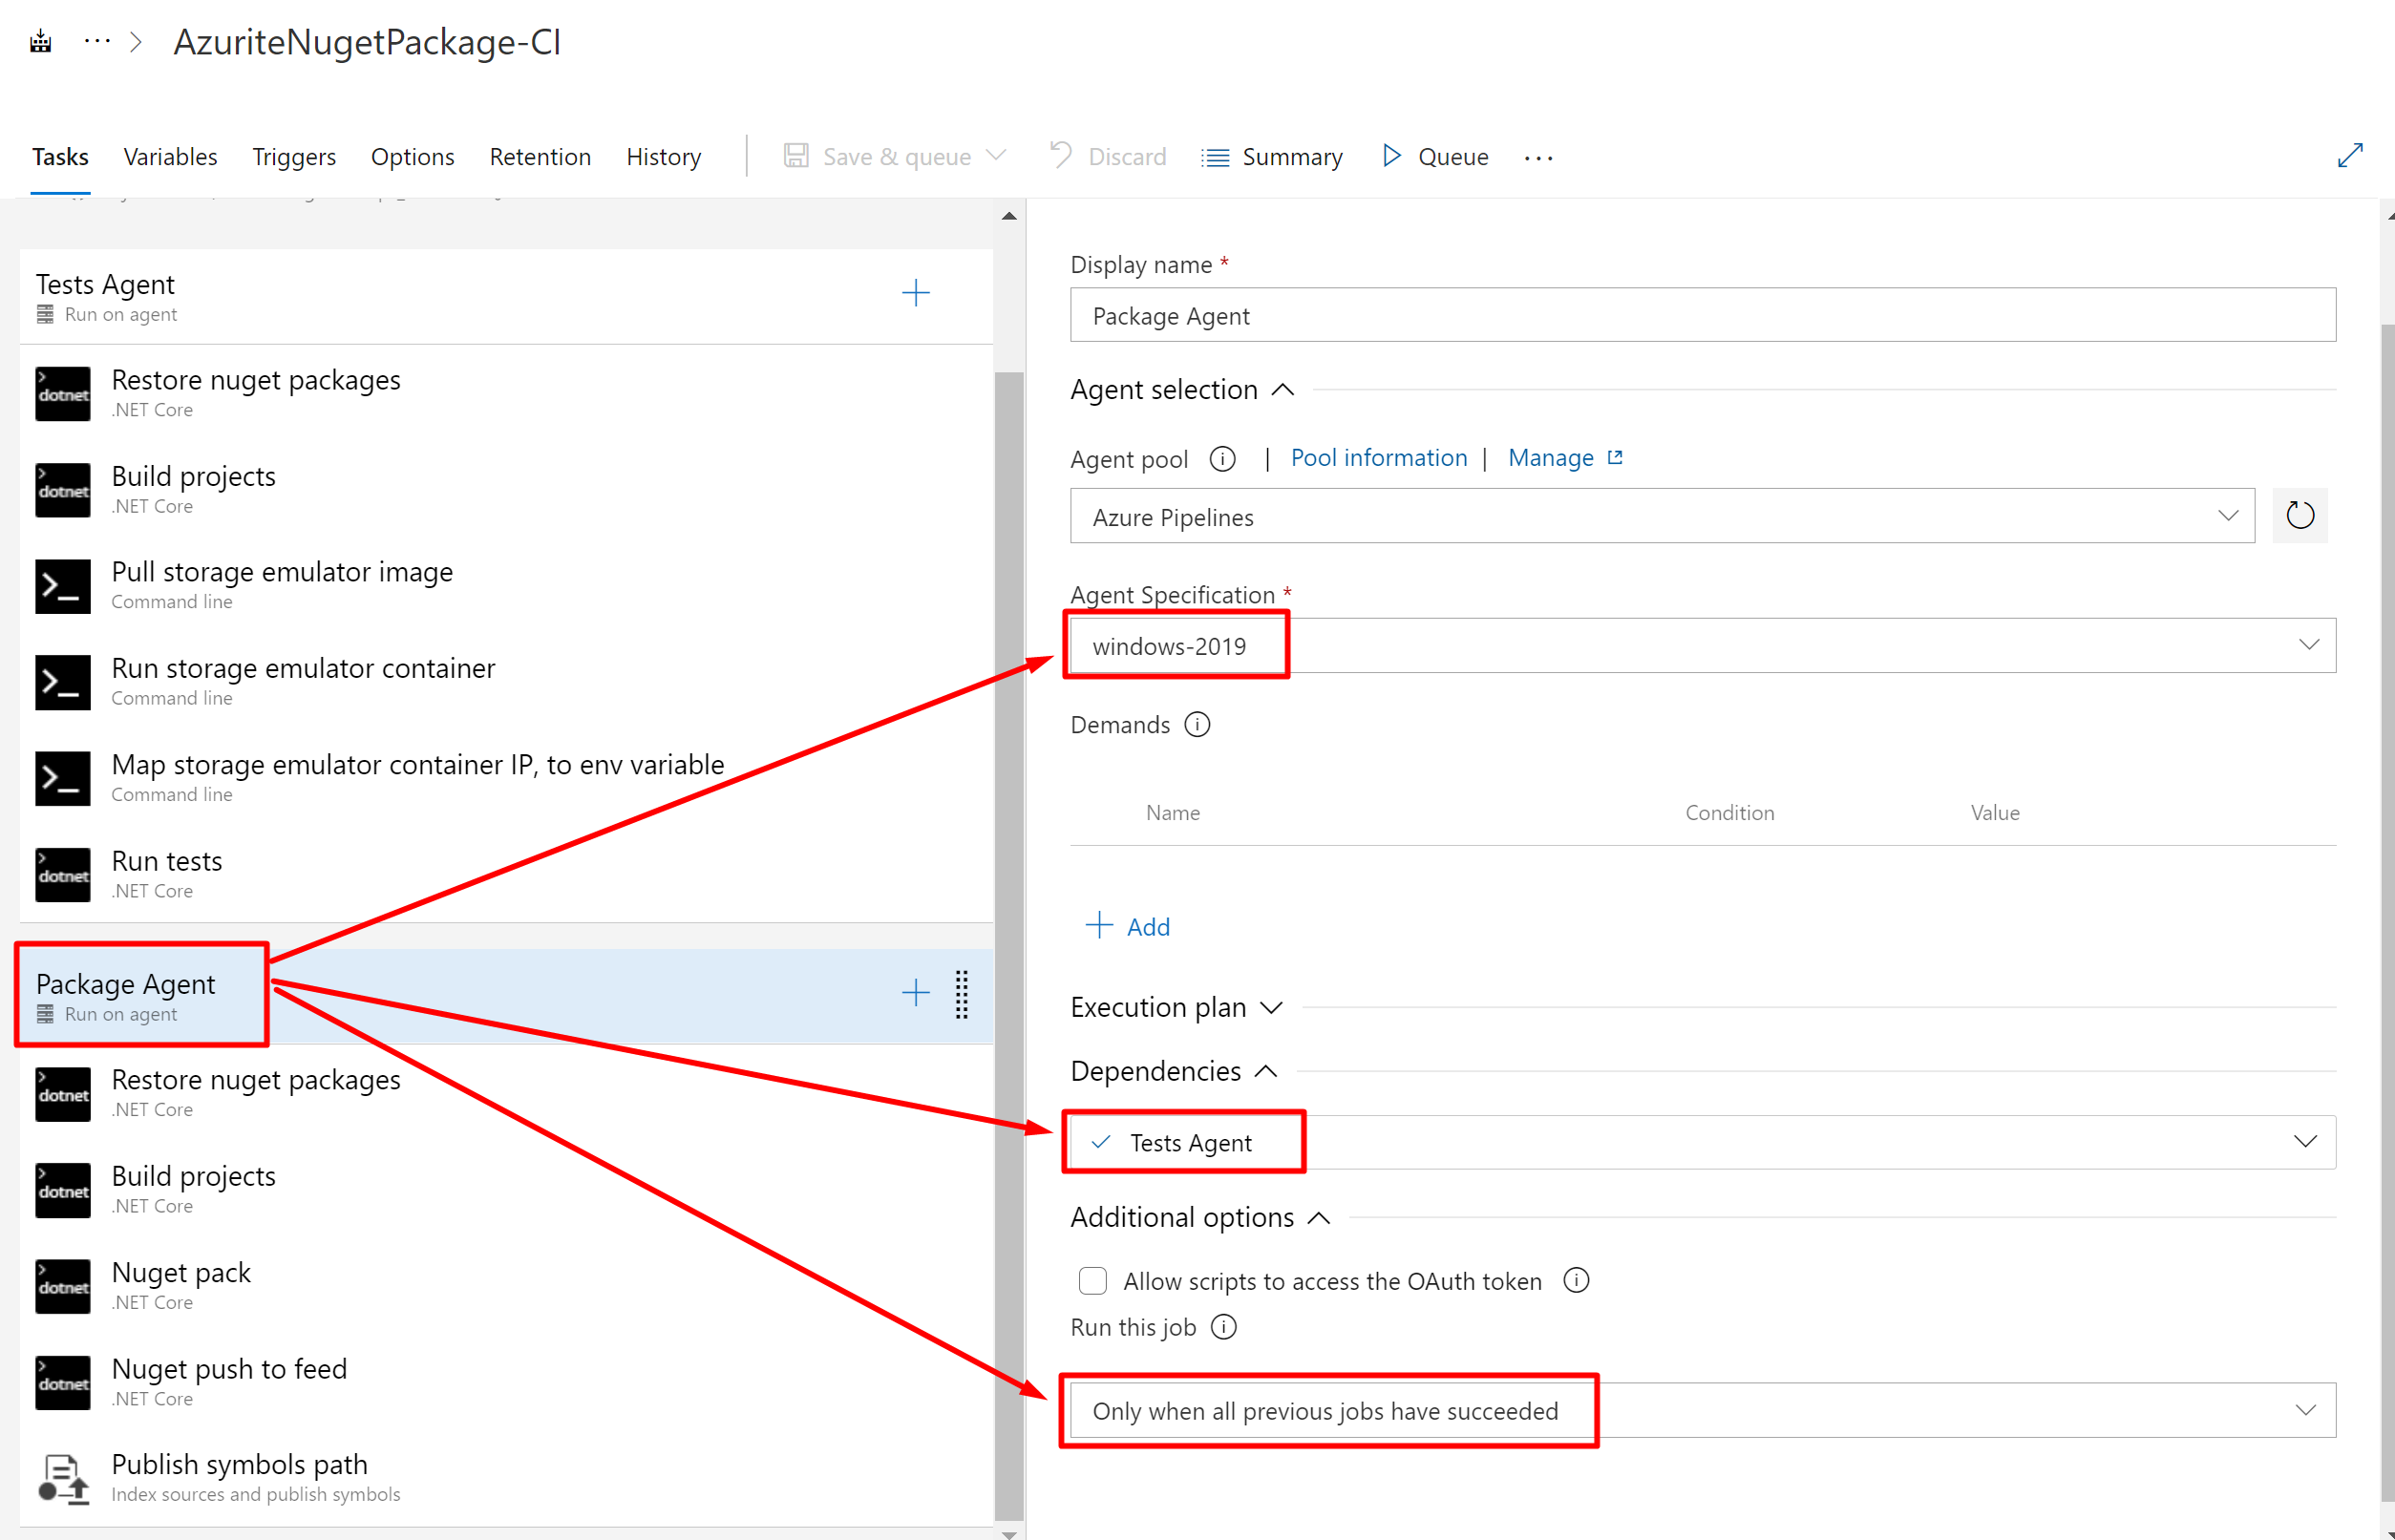
In order to fulfill all our requirements we need to split the pipeline to run in two jobs:
- Tests Agent — Is an agent job with a Linux based OS. Here we ensure to restore the packages (for test project only), build the project (test project only), run Azurite docker container and run our tests against it.
- Package Agent — Is an agent job with a Windows OS. Here we ensure to restore the packages (for library project only), build the project (library project only), pack & push the newly created NuGet package, and publish our package’s symbol’s to the symbols server in Azure.
We also make sure to set the dependencies of this agent to “Tests Agent” and also to select “Only when all previous jobs have succeeded”.
This ensures that the Tests Agent always runs before the Package Agent, so we are sure our tests are all passing and we are not publishing a malfunctioning package to our feed.
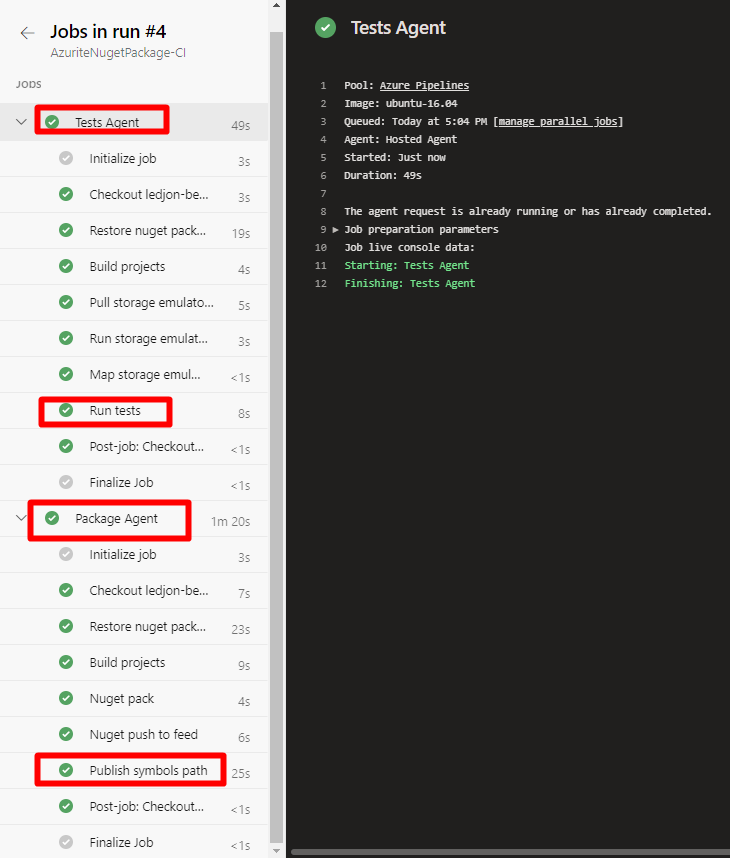
Running the pipeline (attempt 2)
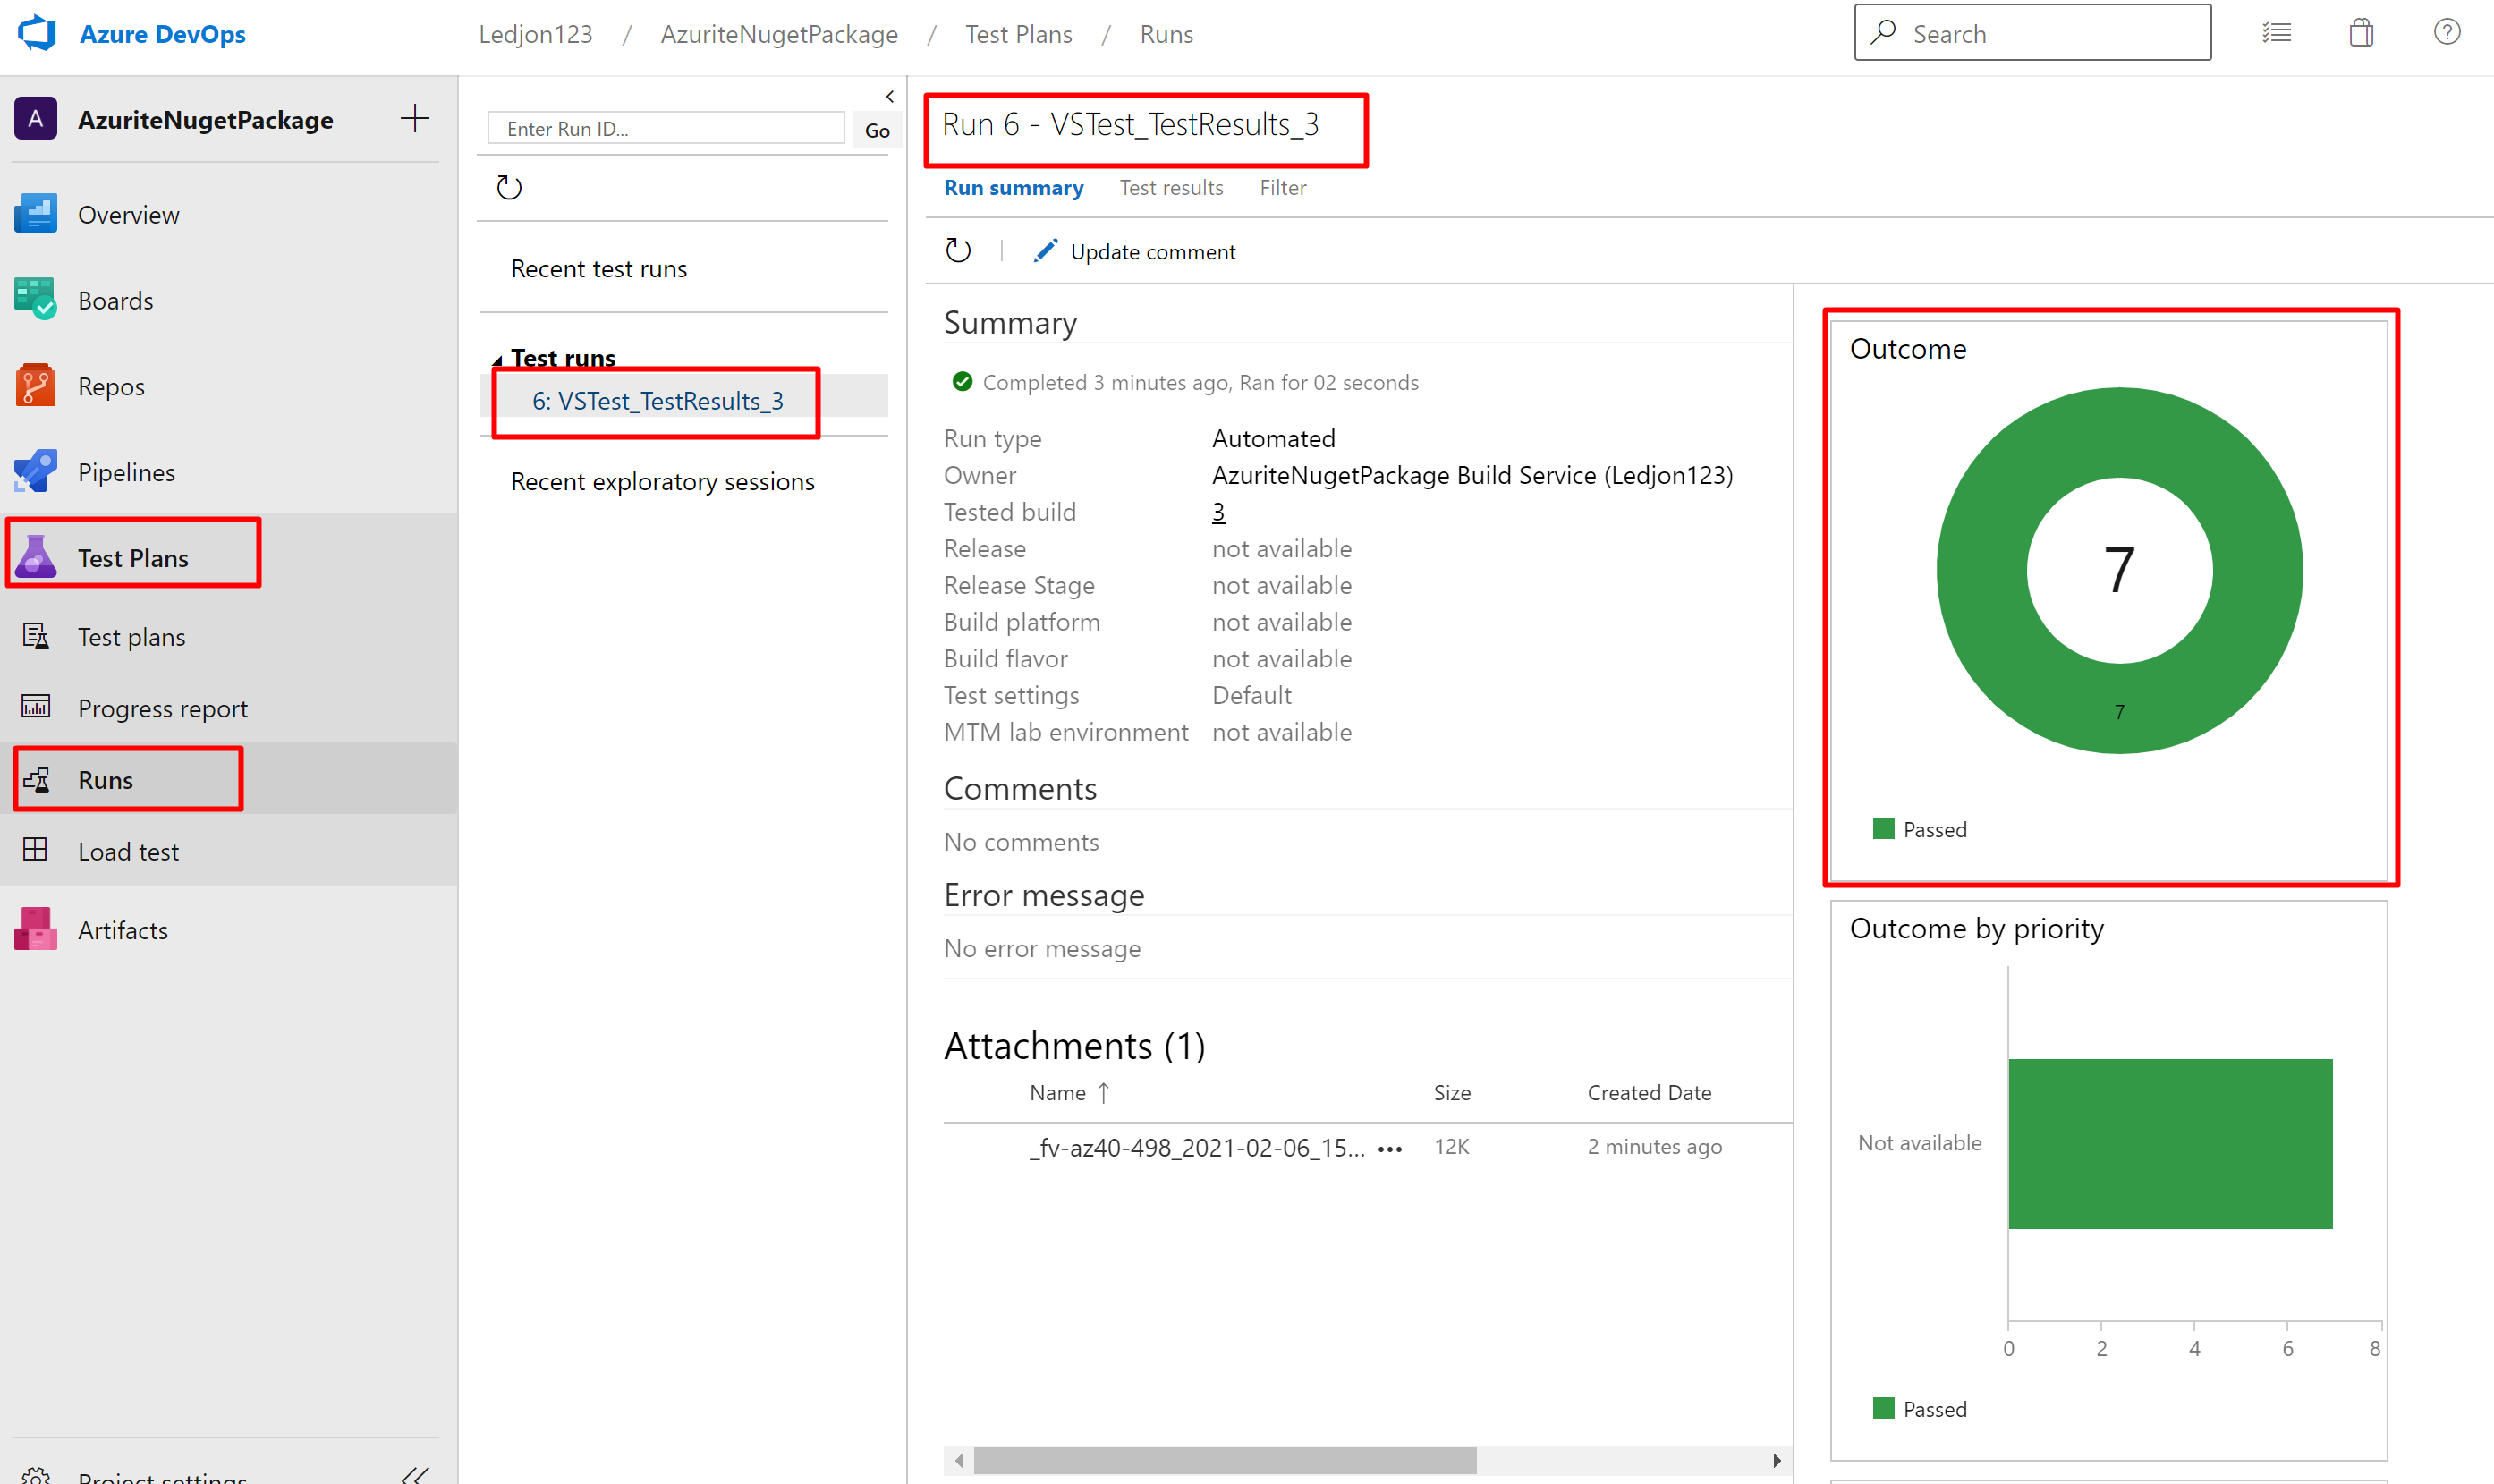
After we run the pipeline with two jobs, we notice that everything has went we well and all our requirements have been satisfied.
If we go to “Test Plans > Runs” and selected the latest test run, we can see that all tests are passing.
Consuming the NuGet package
There are some steps involved to consume our debuggable NuGet package inside Visual Studio. But I am not going to elaborate on them in this article.
There is already a very good article on this topic.
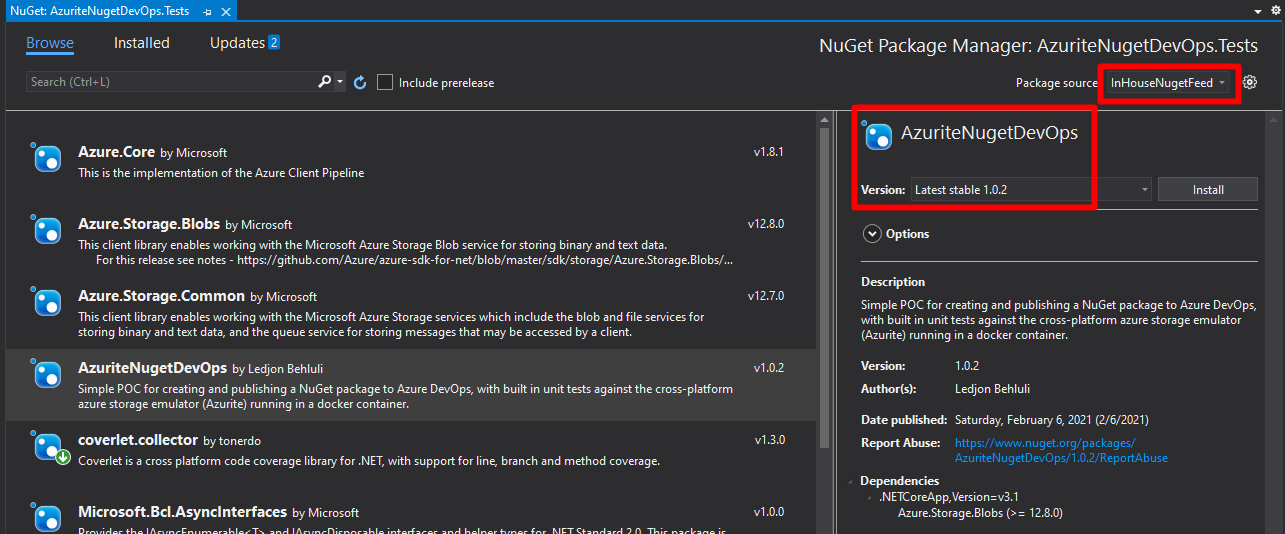
After we have setup everything we should see our package within NuGet Package Manager in Visual Studio.
Now we can go ahead and use our package seamlessly and we can debug through it if we need to.
The reason why the latest stable version is 1.0.2 is because we did two runs before the last one.
And although the symbols were not included in those runs, that was no reason for the package to not being build.
Summary
This article was aimed to explain how to create a debuggable NuGet package from our library, deploy it to a feed in Azure DevOps, and run tests against Azurite in the build pipeline.
If you found this article helpful please give it a share in your favorite forums 😉.
The solution project is available on GitHub.